
News
Direct answer: Incoming inspection is the last cheap place to catch the wrong part. Before a reel, tray or tube reaches a feeder, three checks decide its fate: the label must match the purchase order and the BOM line exactly, the dry pack must be sealed with a readable humidity indicator card, and the reel itself must be physically fit to load — enough leader, no crushed pockets, no damaged cover tape. A reel that fails any of these is quarantined, not loaded “to see how it goes.” Once a wrong reel is on the feeder, the placement program trusts the label, and the machine will place the wrong part at full speed until somebody notices.
Every SMT defect has a cheapest point of discovery, and for wrong parts that point is the receiving bench, not the feeder, not the reflow oven, and certainly not the customer’s goods-in. A reel loaded with the wrong value, the wrong package or the wrong lot costs a few minutes to catch at receipt and a scrapped batch to catch after reflow. This article is a receiving checklist for reels, trays and tubes: what to read on the label, what the moisture indicator card actually tells you, how much leader a reel needs, what physical damage matters, and what to do — release, quarantine or return — when a check fails.
One scope note up front. JHIMS builds and supplies SMT equipment; it does not sell components. This is a receiving checklist for buyers and incoming-quality staff, not a product guide, and none of the checks below require a JHIMS machine. Where a machine is mentioned, it is the machine that consumes the inspected parts, and the specifications quoted for it are the manufacturer’s published figures.
Incoming inspection answers one question: is this the part we ordered, in the condition we ordered it, in a package the line can use? It is a receipt gate. It happens once, at the door, before the parts enter stock or reach a feeder. It does not test whether the part works electrically — that is a different job, done with different equipment — and it does not replace the checks that come later.
Three neighbouring checks are often confused with it, so the boundaries matter. First, moisture-sensitive component storage — floor life, baking and dry cabinets — is what happens after receipt, once a dry pack has been opened and the parts live on the factory floor. This article stops at the receipt gate: it covers reading the indicator card and the MSL label when the pack arrives, and it does not rewrite baking or floor-life rules. Those come from the component’s own datasheet and its MSL label. Second, bare-board incoming inspection looks for fabrication defects in the printed circuit board itself — a different buyer question from components on reels and trays, and a different checklist. Third, first-article inspection verifies the first assembled board after the line has run; incoming inspection verifies the parts before any board is built. A good first-article result cannot rescue a wrong reel, because the first article was built from that reel.
The single most valuable check at receipt costs nothing and needs no equipment: compare three documents and make them agree. The reel label, the purchase order and the BOM line must describe the same part. Any disagreement stops the reel at the bench.
Start with the part number, including the packaging suffix. Manufacturers sell the same electrical part in several packages and several packings, and the suffix is what distinguishes them. A part number that matches except for the last letters is a different orderable part: it may be the same chip in a different package, on cut tape instead of a full reel, or with a different moisture rating. If the suffix on the label does not match the suffix on the purchase order, treat it as a mismatch, not a clerical detail.
Then check the quantity against the purchase order, the date code and lot code against what was ordered, and the internal part number or BOM line reference if your labels carry one. The internal reference is what connects a physical reel to a line on the BOM without guessing; a reel that carries only the manufacturer’s number and no internal reference can still be received, but the receiving record must make the link explicitly, or the reel becomes anonymous the moment it is separated from its paperwork.
Finally, where the parts are visible, compare the label with the marking on the parts themselves. The date code and lot code on the label should match the markings on the components. A mismatch between label and part marking is one of the strongest warning signs in this whole checklist, and it is covered in detail in section 6.
A factory reel label is a small document, and every field on it earns its place. The table below is the field-by-field read: what the field is, where to find it, and what counts as a failure.
| Field | What to check | Fail means |
|---|---|---|
| Manufacturer part number | Matches the purchase order exactly, including the packaging suffix | Quarantine — do not load, do not assume the suffix is irrelevant |
| Quantity | Matches the purchase order; the count is verified as described in section 7 | Quarantine the shortfall, record it, tell purchasing — do not top up silently from another lot |
| Date code and lot code | Present, legible, and consistent with the markings on the parts | Quarantine — a missing or mismatched code breaks traceability |
| MSL rating and seal date | Printed on the moisture-barrier bag label for moisture-sensitive parts, with the floor-life limit for that level | Quarantine — without the label, nobody on the floor can know how long the parts may stay out |
| Manufacturer and origin | Named on the label, consistent with the supplier named on the order | Quarantine and ask the supplier — an unnamed or inconsistent source is a traceability gap |
| Label condition | Original manufacturer label, readable, not covered by another label | Quarantine — a label stuck over another label is a suspect-part sign (see section 6) |
Two habits make this table work in practice. First, read the label before opening anything. The label is the only link between the parts and the order, and once a bag is opened or a reel is separated from its box, that link is the only thing left. Second, photograph a failed label before doing anything else. A photograph of the label, the box and the part marking is the evidence purchasing needs to raise a return, and it costs seconds at receipt but may be impossible to reconstruct later.
Moisture-sensitive parts travel in a dry pack, and the industry standard that defines it is IPC/JEDEC J-STD-033. A complete dry pack has four elements: a moisture-barrier bag, desiccant, a humidity indicator card, and an MSL label. If any one of them is missing or unreadable, the pack cannot be verified, and the parts are quarantined — not because they are certainly damaged, but because nobody can show they are not.
Check the seal first. The bag should be heat-sealed, not folded, taped or clipped shut, and the seal should be continuous. A bag that arrives open, torn or resealed with tape has lost the protection the dry pack was supposed to provide, whatever the indicator card inside says. Desiccant should be present in the bag; exhausted desiccant protects nothing, so a bag with no desiccant, or with desiccant that has clearly been exposed, is a failed check.
The humidity indicator card is the part most often misread. It is a small card with spots that change colour from blue (dry) to pink (humid) at stated relative-humidity thresholds — a typical three-spot card reads at 10%, 30% and 60%, and the thresholds printed on the card itself are the ones that count. The card is required inside the sealed bag for moisture-sensitive parts rated MSL 2 and above, and it must be read when the bag is opened. Two things about the card are commonly misunderstood. First, it reports the humidity inside the bag during transport and storage, not the moisture content inside the components; it is the first basis for judgement, not the final word. Second, a pink spot is a signal to stop and check, not a verdict by itself: quarantine the parts, read the MSL label, and follow the component’s own datasheet. Do not load pink-indicated parts on a guess, and do not invent a baking time at the bench. If the 60% spot has changed colour, the card itself should not be reused in moisture-barrier packaging; a resealed bag needs a fresh card and fresh desiccant.
What this article deliberately does not state. It gives no floor-life hours per MSL level and no baking time or temperature. Those numbers belong to the component’s own MSL label and datasheet and to J-STD-033, and they differ by part and by level. Floor life is cumulative — time out of the bag adds up across openings and does not restart — so the only safe reading is the one printed on the label for that lot. Any article that prints a single hour figure as a general rule is asking to be misapplied.
The MSL label itself carries the level (MSL 1 to 6, higher meaning more sensitive), the bag seal date, and the floor-life limit for that level. Read it off the label for the lot in hand. A label that is missing, illegible or detached from its bag is a failed check for the same reason a missing part number is: the floor cannot know how long this batch may stay out, and the record cannot show it later.
A reel can carry the right label and still be unusable. The physical checks are about whether the package will feed. Start with the leader: a full reel begins with a length of empty pockets so the tape can be threaded through the feeder without losing parts, and ends with a trailer of empty pockets. The carrier-tape standard EIA-481 sets the minimums — a leader of at least 400 mm of cover tape, including at least 100 mm of carrier tape with empty compartments, and a trailer of at least 160 mm of empty carrier tape. Measure the leader rather than estimating it: a reel with a leader cut too short cannot be loaded, and the usual fix — splicing on a length of leader tape — is a repair that should be recorded, not an invisible workaround.
Then look at the tape itself. The cover tape should be adhered along its full length, with no peeling edge that could lift in the feeder and no splice in the first section that the feeder has to peel. Pockets should be intact and uniformly formed; crushed, torn or deformed pockets mean parts that may be loose, mis-oriented or missing. A reel that is cracked, warped or has a damaged hub will not rotate evenly in the feeder, and uneven rotation is a pickup-error generator. The common reel sizes are 7-inch (about 180 mm) and 13-inch (about 330 mm) diameters, and the feeder must be set for the size in hand — a 13-inch reel forced onto a 7-inch setup is a handling accident waiting to happen.
Trays need the same treatment with different failure modes. Check that the tray is the right tray for the part — correct pocket size and orientation — that no pockets are empty where parts should be, that no parts are stacked two-to-a-pocket, and that the tray is not cracked or warped. A warped tray does not sit flat in the tray feeder, and a part sitting proud of its pocket is a part the nozzle will pick at the wrong height or miss entirely.
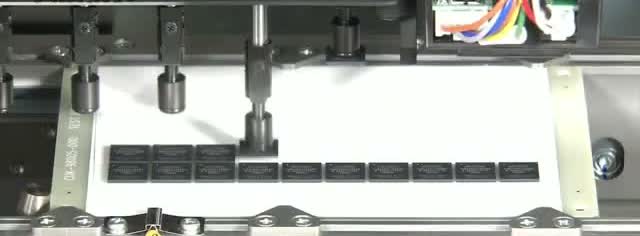
Tray-fed components on a placement machine: a nozzle picks one black rectangular part from a white tray. This is a tray photograph, not a reel or label photograph — the reel and label checks in this article happen before parts reach this point.
Cut tape deserves a warning of its own. A section of carrier tape cut from a reel loses the factory reel label with its part number, quantity, date code and lot code, and it usually arrives with no leader. Cut tape is usable, but only as a labelled, counted item of its own: it needs its own label carrying the part number, quantity and lot or date code, and enough empty pockets at each end for the feeder to grip. Tape cut through populated pockets, or so short that the feeder cannot thread it, should be rejected at receipt rather than discovered at the feeder.
Most wrong parts are honest mistakes — a similar part number, a reel from the previous job put back in the wrong box, a supplier shipping the commercial grade instead of the automotive grade. A smaller number are suspect parts: relabelled, mixed or remarked, where the label no longer describes what is in the pockets. Receiving inspection cannot prove a part is genuine — only the manufacturer or an authorised source can confirm that — but it can screen out the cases where the story does not add up, and screening is the whole job.
The warning signs, in the order they are usually found:
Any one of these signs is enough to quarantine the reel. The correct response is not to argue the part into service — “it looks like the right value” is not a receiving decision — but to hold it, photograph the label and the part markings, and send the evidence to purchasing and the supplier. Keep the original label on the reel: stripping a suspect label destroys the evidence and makes the return harder.
Quantity is the check most often skipped, because counting thousands of parts by hand is nobody’s idea of a morning well spent. It is also the check that decides whether a job stops halfway through a board. The quantity per reel is set by the manufacturer and listed in the packaging section of the datasheet, so the label quantity is verifiable against a published figure, not a guess.
Three methods cover most receiving benches, and a bench should have at least one of them. A component counter counts a reel directly and is the most conclusive option for small and medium lots. A weight comparison against a known-good reel of the same part and lot catches gross shortages quickly, provided the comparison reel is genuinely identical — same part, same lot, same reel size — and the scale is adequate. A feeder-based count, running the reel through a counter or the machine’s own feeder in a counting mode before the job, verifies the count in the same handling the line will use. Which method a factory uses, and how much of a delivery it samples, is a matter for its own quality agreement with the customer — this article prescribes no sampling percentage as a standard, because a percentage that is right for a high-volume consumer job is wrong for a low-volume medical one.
An illustrative example shows why the record matters more than the method. Suppose a reel is labelled 4,000 pieces, the job needs 3,850, and the count comes back at 3,720. The job is short by 130 pieces — not because anyone miscounted on the line, but because the reel was short on arrival. The numbers in this example are invented to show the arithmetic; the point is the decision. The shortage is recorded on the receipt record, purchasing is told the same day, and the line is not started on the assumption that a second reel of a different lot will make up the difference. Topping up silently from another lot mixes lots on one job and destroys the traceability the label was there to protect.
Every finding at receipt ends in one of three dispositions, and the receiving bench should make the decision the same day the parts arrive. Delay is itself a failure mode: an undecided reel drifts into stock, and a reel in stock is a reel somebody will load.
| Finding | Disposition | What happens next |
|---|---|---|
| Label, quantity, dry pack and reel all pass | Release | Record the receipt, enter stock with the lot and date code, and file the record by job |
| Label mismatch, pink indicator card, damaged reel, short count, suspect markings | Quarantine | Move to a physically separate quarantine area, tag it (see below), photograph the evidence, notify purchasing the same day |
| Confirmed wrong part, short quantity the supplier accepts, damaged beyond use, suspect part the supplier cannot clear | Return | Keep the original label and packaging, return with the photographs and the receipt record, and record the return against the purchase order |
| Dry pack opened for inspection and parts are good | Re-bag and release | Reseal in a moisture-barrier bag with fresh desiccant and a fresh indicator card, and re-label with the lot, the seal date and the MSL rating |
Quarantine only works if it is physical. A reel with a red tag sitting on the same shelf as released stock will be loaded by the next person in a hurry. A quarantine area should be a separate shelf, bin or room, and the tag on the reel should carry six fields: the part number, the quantity, the lot and date code, the date of receipt, the reason for the hold, and the name of the person who raised it. A tag that says only “hold” tells the next shift nothing, and an untagged reel in quarantine is an unlabelled reel in stock.
A receiving routine that takes ten minutes per delivery will be done; a routine that takes an hour will be skipped. The routine below is the whole job, in order, for one delivery of reels, trays or tubes:
The receipt record is the audit trail, and it needs eight fields: date of receipt, supplier, purchase order number, manufacturer part number, quantity received, lot and date code, MSL rating with the indicator-card reading, and the disposition. A record with those eight fields answers, months later, which lot went onto which job and why a reel was held. A record without them answers nothing, and the factory will discover that at the worst possible moment — during a customer audit, or a field failure investigation.
An inspected reel is only as useful as the feeder it goes onto. The placement machine reads the feeder program, and the feeder program names a part number and a feeder slot; it does not verify that the reel in the slot is the part named. That is why the receiving bench exists: the machine trusts the label, so the label must be right before the reel is loaded.
The machine that consumes the parts matters because its feeder capacity sets how many inspected reels a job needs at once. The Yamaha YSM40R, for example, carries up to 80 component types on the RS head and up to 88 on the MU head, measured in 8 mm tape equivalents, with a vision system — fiducial, multi-camera and side-view, with smart recognition — that checks each picked part, and a cATS tray carriage that supplies tray components in up to 30 layers without stopping. Its placement accuracy is ±0.035 mm (±0.025 mm high-accuracy), Cpk ≥ 1.0. Those figures are the manufacturer’s published specifications, and they describe what the machine does with parts that are correct. No accuracy figure compensates for a wrong reel: the machine will place the wrong part exactly where the right part was supposed to go, at its full rated accuracy.
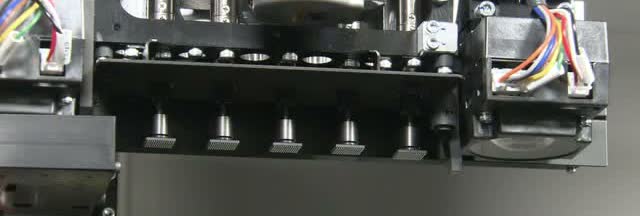
The placement head that picks the inspected parts: a row of nozzles on a YSM10 head. This is a nozzle photograph, not a reel photograph — the reel checks in this article happen before parts reach the head.
The next gates after receipt are downstream, not substitutes. The fiducial check aligns the board before the first pick, and the SPI and AOI steps verify paste and joints after placement — a buying-order guide for those two inspection steps is a useful companion to this one. But none of them can catch a wrong part that was verified at receipt and then loaded correctly: that is exactly the point of the receiving bench. Get the reel right, and every downstream check gets to do its own job instead of compensating for a mistake made at the door.
For the placement machine that consumes the inspected reels, see the Yamaha YSM40R pick and place machine. For the next gate after the parts are verified, the fiducial check that aligns the board before placement, see Fiducial Marks: The Small Circles That Decide Whether Placement Lands Where It Should. For the inspection steps that follow placement, see SPI or AOI First? A Buy-Order Decision Guide for SMT Lines.
No. Quarantine it and ask the supplier for the label information — part number, quantity, lot and date code. “Looks right” is not a receiving decision, and a reel without a label has no traceability: if that job later fails, there is no lot to investigate and no supplier to hold to account.
Quarantine first, then read the MSL label and the component’s datasheet. The card tells you the bag saw humidity; it does not tell you the moisture inside the components, and it does not prescribe a baking cycle. Whether the parts are baked or returned depends on the MSL rating, the seal date and the supplier agreement — decide from those documents, not from the colour alone, and never guess a baking time at the bench.
Only after it is made loadable: its own label with part number, quantity and lot or date code, and enough empty pockets spliced on at each end for the feeder to grip. Tape cut through populated pockets, or too short to thread, should be rejected at receipt rather than discovered at the feeder.
The label, dry-pack and physical checks in this article apply to every reel, tray and tube in the delivery — they are quick, and a single wrong reel is enough to scrap a batch. How much counting and sampling a factory does beyond that is set by its own quality agreement with the customer, and this article prescribes no percentage as a standard.
No. They are different gates. Incoming inspection verifies the parts before any board is built; first-article inspection verifies the first assembled board after the line has run. A good first article built from a wrong reel only proves the machine placed the wrong part correctly.
Bottom line: Read the label before opening anything, read the indicator card when the bag opens, measure the leader, and decide release, quarantine or return the same day. The receiving bench is the cheapest inspection point on the line — use it, and the feeder program will be loading the part it names.
Questions about feeder loading on the YSM40R or YSM10, or about setting up a receiving check for your components? Contact JHIMS at [email protected] for technical information.


 Teams
 whatsapp
 telegram
