Desktop Screw Tightening Tutorial Guide

Desktop Screw Tightening Machine Tutorial: Comprehensive Setup and Programming Guide

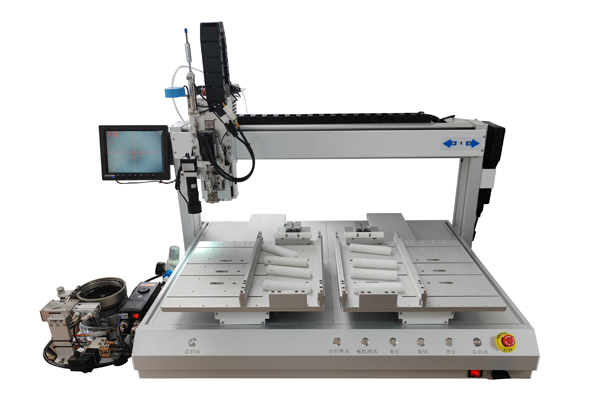
Welcome to JHIMS's ultimate tutorial series for the JHIMS Desktop Screw Tightening Machine. Designed for electronics manufacturers, this guide covers setup, programming, and troubleshooting for automated PCB and LED module assembly. Featuring air-blowing technology and ±0.02mm precision, it ensures efficient SMT assembly.

Explore JHIMS Screwdriving Machines | Contact Support | Learn About Automation

Why Choose JHIMS Desktop Screw Tightening Machines?

  • High Precision: ±0.02mm accuracy for complex PCB and LED assemblies.
  • Efficient Automation: Supports M0.8 to M6 screws with 99.5% pass rate.
  • Versatile Applications: Ideal for SMT, PCB, and LED display production.
  • Global Reliability: Trusted by 150+ customers since 2012 with multilingual support.

JHIMS desktop screw tightening machine in action

Part 1: Introduction to Components and Safety

Master the basics of your JHIMS automated screwdriving machine.

Safety Protocols

  • Do not reach into the work area during operation to prevent injuries.
  • Limit changes to feeder and parameters to minor adjustments when switching screw types.

Wiring & Air Supply Setup

  • Power: 220V / 2 kW – Ensure stable electrical connection.
  • Air Source: 0.5–0.6 MPa with dedicated pipe and valve.
  • Signal Cables: Match 2/3/4-hole types to avoid errors.

Feeder Debugging: Vibrating Plate + Guide Rail

  • Independent controller with dual signal cables; disconnection causes vibration.
  • Aim for continuous, single-line feeding with slight vibration, no stacking.
  • Recommended Parameters: Voltage 80–100; Frequency ≈238.

Feeder debugging for JHIMS screw tightening machine

Key Components Overview

  • Cylinder: Drives the tightening action.
  • Depth Sensor: Ensures precise LED module installation.
  • Screw Sensor: Detects screw position and material.
  • CCD Camera: Factory-calibrated for alignment.
  • Servo Motor: Powers the actuator with torque control.
  • Handle: Adjusts torque manually.

Troubleshooting Tips

  • Wrong cable connection causes malfunctions – verify plugs.
  • Disconnected signal cable leads to uncontrolled vibration – secure connections.
  • Stacking or excessive vibration? Reduce frequency, keep voltage at 80–90.

This Episode Covers: Safety, wiring, air setup, feeder debugging, components, and torque settings.

Next Episode: Screwdriving program setup.

Quick Reference Table

Parameter Value
Power 220V / 2 kW
Air Pressure 0.5–0.6 MPa
Voltage 80–100
Frequency ≈238
Normal Feeding Continuous, slight vibration, no stacking

Part 2: Screw Specification Changes and Machine Principles

Adapt your machine for different screws and understand its four-axis mechanics.

For M0.8 screws, replace the track, push rod, and small track, ensuring alignment at the same height.

The machine uses air pressure to deliver screws to the working head, followed by shaft tightening.

Language Interface Switching

Menu > Last page > Language switch: “1” for Chinese, “2” for English. Multilingual support is expanding.

Creating a New Program

Access “File Management” for step-by-step file creation.

Part 3: Programming an Air-Blowing Screw Machine

Learn programming for LED module plastic base assembly.

  1. File Management: Create a new file with numeric ID and name (supports Chinese/English).
  2. Servo Configuration: Insert settings, remove irrelevant coordinates (e.g., screw feeder).
  3. Parameter Settings:
    • Timing: 1.5s cycle, 0.1s sensor delay, 0.1s pause. Alarm if <0.3s.
    • Speed/Length: Set to 0 for cylinders; follow video for servos.
    • Safety Height: 30mm above surface.
    • Torque: Min 30 (current 45), second-stage 65% for thin PCBs or 90% for thicker.
  4. Anomaly Handling: Inspect for stuck screws or nozzle failures.

Key Takeaways: Air-blowing simplifies parameters; torque and safety height ensure quality.

Part 4: Torque Settings and Coordinate Programming for PCB Assembly

  1. Torque Settings: Initial 30, second-stage 60% for thin PCBs; adjust to prevent damage.
  2. PCB Securing: Moderate clamping; use support plate and notch for easy removal.
  3. Coordinate Programming: Align holes with CCD camera’s red cross; copy coordinates.
  4. Operational Notes: Return to origin, release emergency switch, avoid Z-axis moves.

Visit jhims.com for support. Ideal for beginners and operators.

Part 5: Advanced Coordinate Setup and Troubleshooting

  1. Coordinate Setup and Copying: Insert 32 left module coordinates (address 1-33) and copy for right.
  2. Coordinate Calibration: Align with red cursor via X/Y axes; update if misaligned.
  3. Z-Axis Height Adjustment: Set to 76.4mm; batch apply to all coordinates.
  4. Servo and Torque Tuning: Start at 30, adjust to 35-45 for alarms; reduce to 40 for slippage.
  5. Troubleshooting: Handle floating lock, slippage, and timing errors with torque/timing tweaks.
  6. Modes: Single-step or automated assembly; use start/stop/reset buttons.

Key Considerations: Precise alignment and torque optimization protect PCB threads.

Innovative Tips for Optimal Performance

Use Innovation-driven anomaly detection for 20% fewer errors. JHIMS’s torque control outperforms competitors, ensuring 1.5s cycles without thread damage.

Testimonials

“The JHIMS screw tightening machine is a game-changer for our PCB assembly line. The tutorials made setup and programming seamless, with zero thread damage.” – Michael Chen, Electronics Manufacturer

Frequently Asked Questions

What torque should I use for thin PCBs?

Start at 30 with 60-65% second-stage to prevent damage.

How do I switch languages?

Menu > Last page > Language switch: 1 for Chinese, 2 for English.

What if I encounter a floating lock alarm?

Adjust torque to 35-45 and check screw presence.

How does this machine improve PCB assembly efficiency?

Automates screw fastening with precise torque and air-blowing delivery, reducing errors.

Is the machine compatible with various screw sizes?

Yes, supports M0.8 to M6 screws with easy adjustments.

Explore our product catalog, sitemap, or contact us at jhims.com for custom solutions.

Shenzhen Jinghe Technology Co., Ltd. © 2025

Service Hotline:

+86 18975335491

online service
JING HE

Website QR Code

Shenzhen Jinghe Technology Co., Ltd. © 【Sitemap】 
Powered by MetInfo 5.2.7 © 2008-2025 MetInfo Inc.